After several days of rehearsal and preparation, the fashion is a success!! 


Thanks for the photographers at the event that provided these photos.
After several days of rehearsal and preparation, the fashion is a success!!
Thanks for the photographers at the event that provided these photos.
This the dress by the end of the painting and drying. Thank to my friend who borrowed the photography studio, I managed to play around with some poses.


Also, I removed 1 extra joint on my wings as the wings might be too heavy for the feathers. However, as the 2 wings have slightly different weight. But its slightly off on both sides.
On Friday, we woke up at 7am to transport the mannequins and also at night we went to museum to set up our work. The ride to the museum was long and tedius as everyone had a lot of baggage and it was a rainy day ( on peak hours).
Exhibition @ Art Science Museum:

Had a lot of fun explaining different concepts and wearable technology to people around the world.
I made some feathers with paper and also have some feathers.
I chose to mix both medium showing that things that are man-made and natural elements can mix together.
Then I added the feathers on the wooden frame.
Also, Prof Galina suggested that I should have a dress to go with the wings since for the exhibition, the pieces have to showcase on the mannequin. So I choose a basic dress pattern. Prof Galina helped me with coming up with the dress patterns and she also taught me to use the industrial sewing machine. This is how the dress will look like with the hood.


I went back a few days later to paint patterns on the dress.

I tried the servos on the frame of the wings, and realized that they are unable to hold up just the wooden frames, without the servos. Thus, I ordered 2 servos with 13kg/cm Torque. These are stronger servos should be holding the wings up.

Also, the servos are moving slightly too fast for the wings. So with help from Prof Naga, I was able to include a new library that alter the speed of the wings. Since my Z-axis is a sweep on the servos, it doesn’t make sense. Prof Naga helped me too switch controls between 2 servos.
So I finally connected all the wires to the Arduino UNO, Servos and the joystick.

I tried with 3 servos that controls the X, Y rotation of the joystick.
The joystick has a Z value, which is normally a button. Currently I set it as sweep on the servo.

So everything works for now.
I am awaiting for new gears to be collected from the online shop. So that I can fix the mechanism onto the wings. But so far. I have combined all that I can with the materials available. 
I also finished up the code with the Servos within Arduino. I probably have to do many tweaks to the code after I have attached it so now is waiting for the materials to arrive.
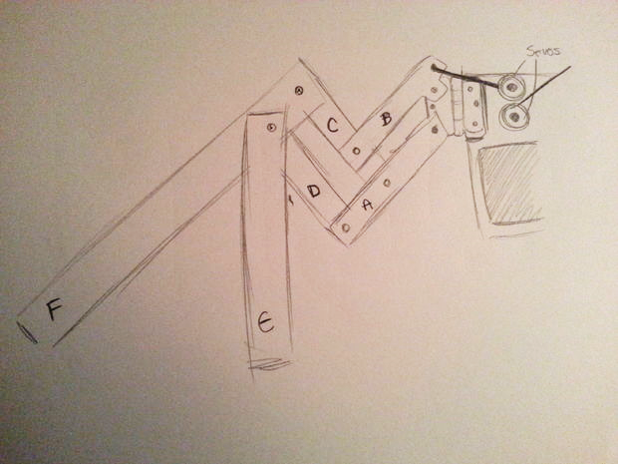
After finishing my garment, I should move on to the highlight of the project, the wings. So back to the drawing board where I have to look at the details and get exact measurements for the wings.
Here is the plan for the wings:

The wings are made up on 3 major joints and has at least 3 servo each.
Servo 1: Rotating the from sideways to back
Servo 2: rotating the wings upwards to down wards
Servo 3: extending the wings.
Servo 1 and servo 2 is pretty tricky to attach as I need to make a mechanism to make it be able to be a semi-hinge ( so it can be moved on 2 axis). I asked around if there are similar mechanism around the school but the other equipments are far too bulky and heavy to be added on. I might be making it myself.
Servo 3 is the central servo that can manipulate many different gears (which controls the bones of the wings). Having different sized gears is able to make the each bone of the wing extend in the correct angel.
Thanks to Li Xuan again, I was apple to learn how to some basic wood cutting/drilling techniques so that I can make the basic frame of the wings.

I am bad at sewing so I have to learn how to use a sewing machine from scratch. Luckily my friend Li Xuan teach me the basics for using the sewing machine and how to prevent mistakes. She also helped me a lot with the fitting and getting correct cuts.
The basic dress form for the hood is like this:

Sewing is not easy to beginners. It took me a while to get used to. Using the sewing machine is like a very zen metaphor:
“One cannot force the cloth into the sewing machine, one could only guide it and let the sewing machine lead you.”
After a long day, I have finally finished with making the hood. Even thou I was advised to make a dress together with it, I decide to put that plan on hold until I can finish the wings first. (Thanks Li Xuan for testing it out)


After some basic planning I decided on getting the materials ready. So I did some research and look for what I needed.
And waiting for some time, the materials has arrived.
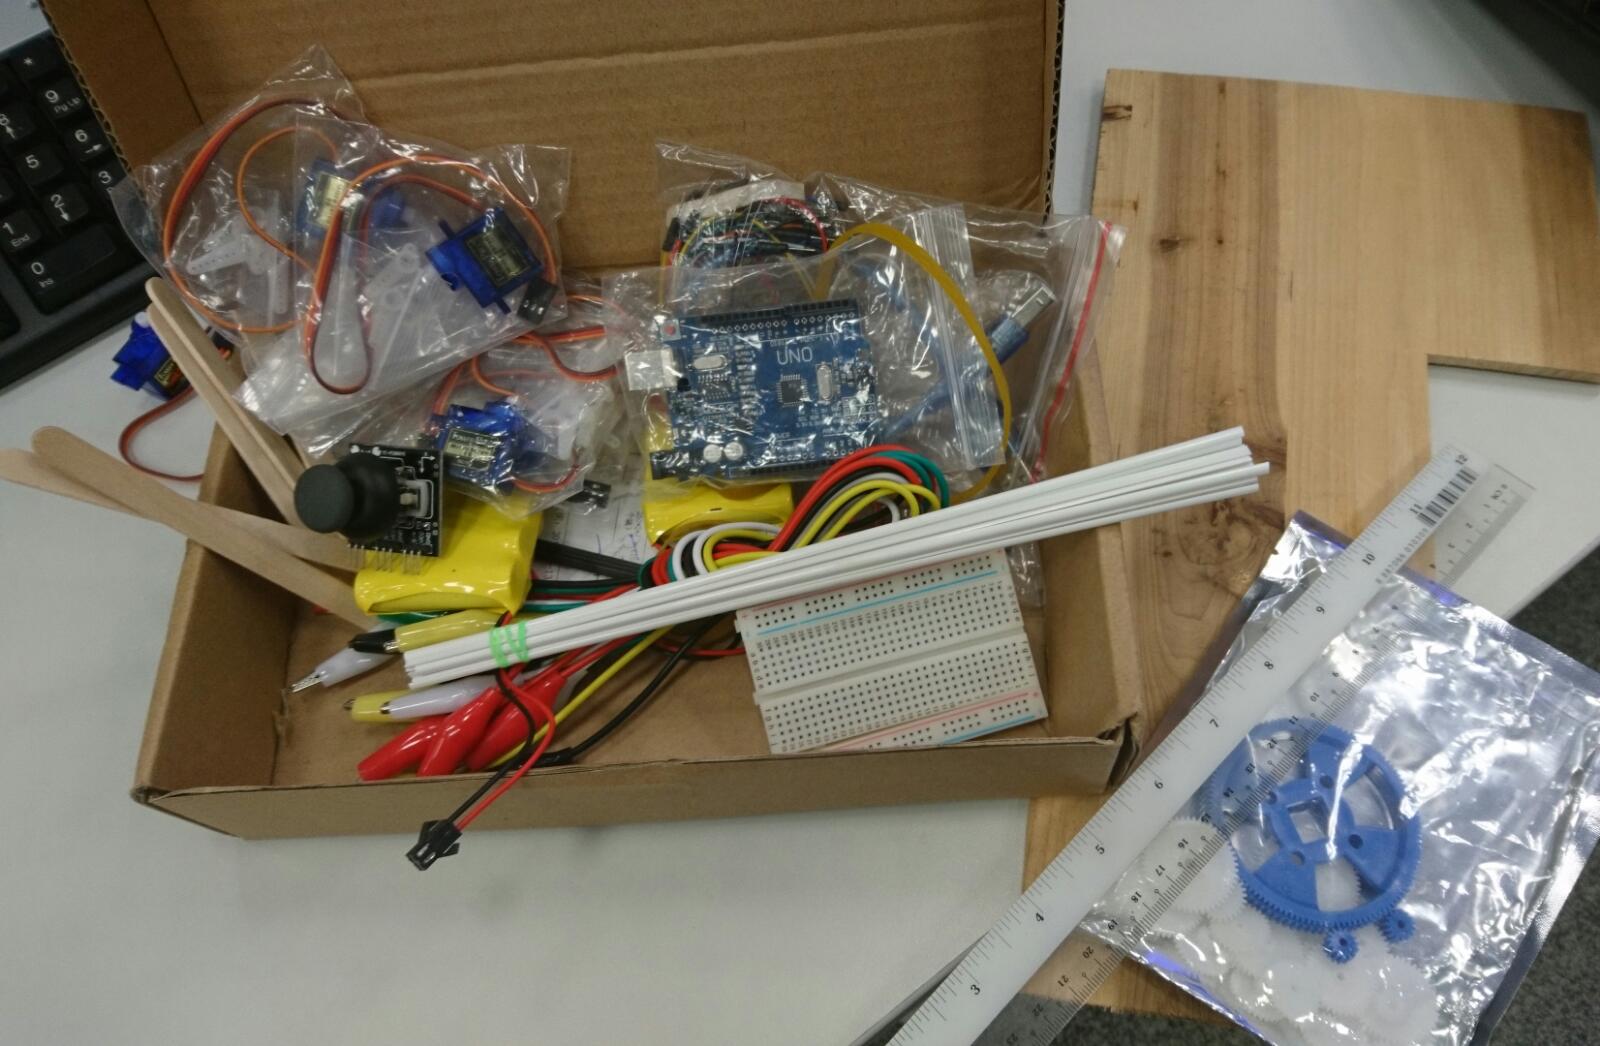
Getting to know Arduino:
Spend a day trying to figure how servos and joystick work. A joystick that can sense both x and y axis, then a click button. The x and y axis sensors are actually 2 built in potentiometer and the click is just a simple button interface. I also tried to see how working with 9G servos. Apparently the once I ordered only have 180 degrees sweep. But I worked around it by using gears.
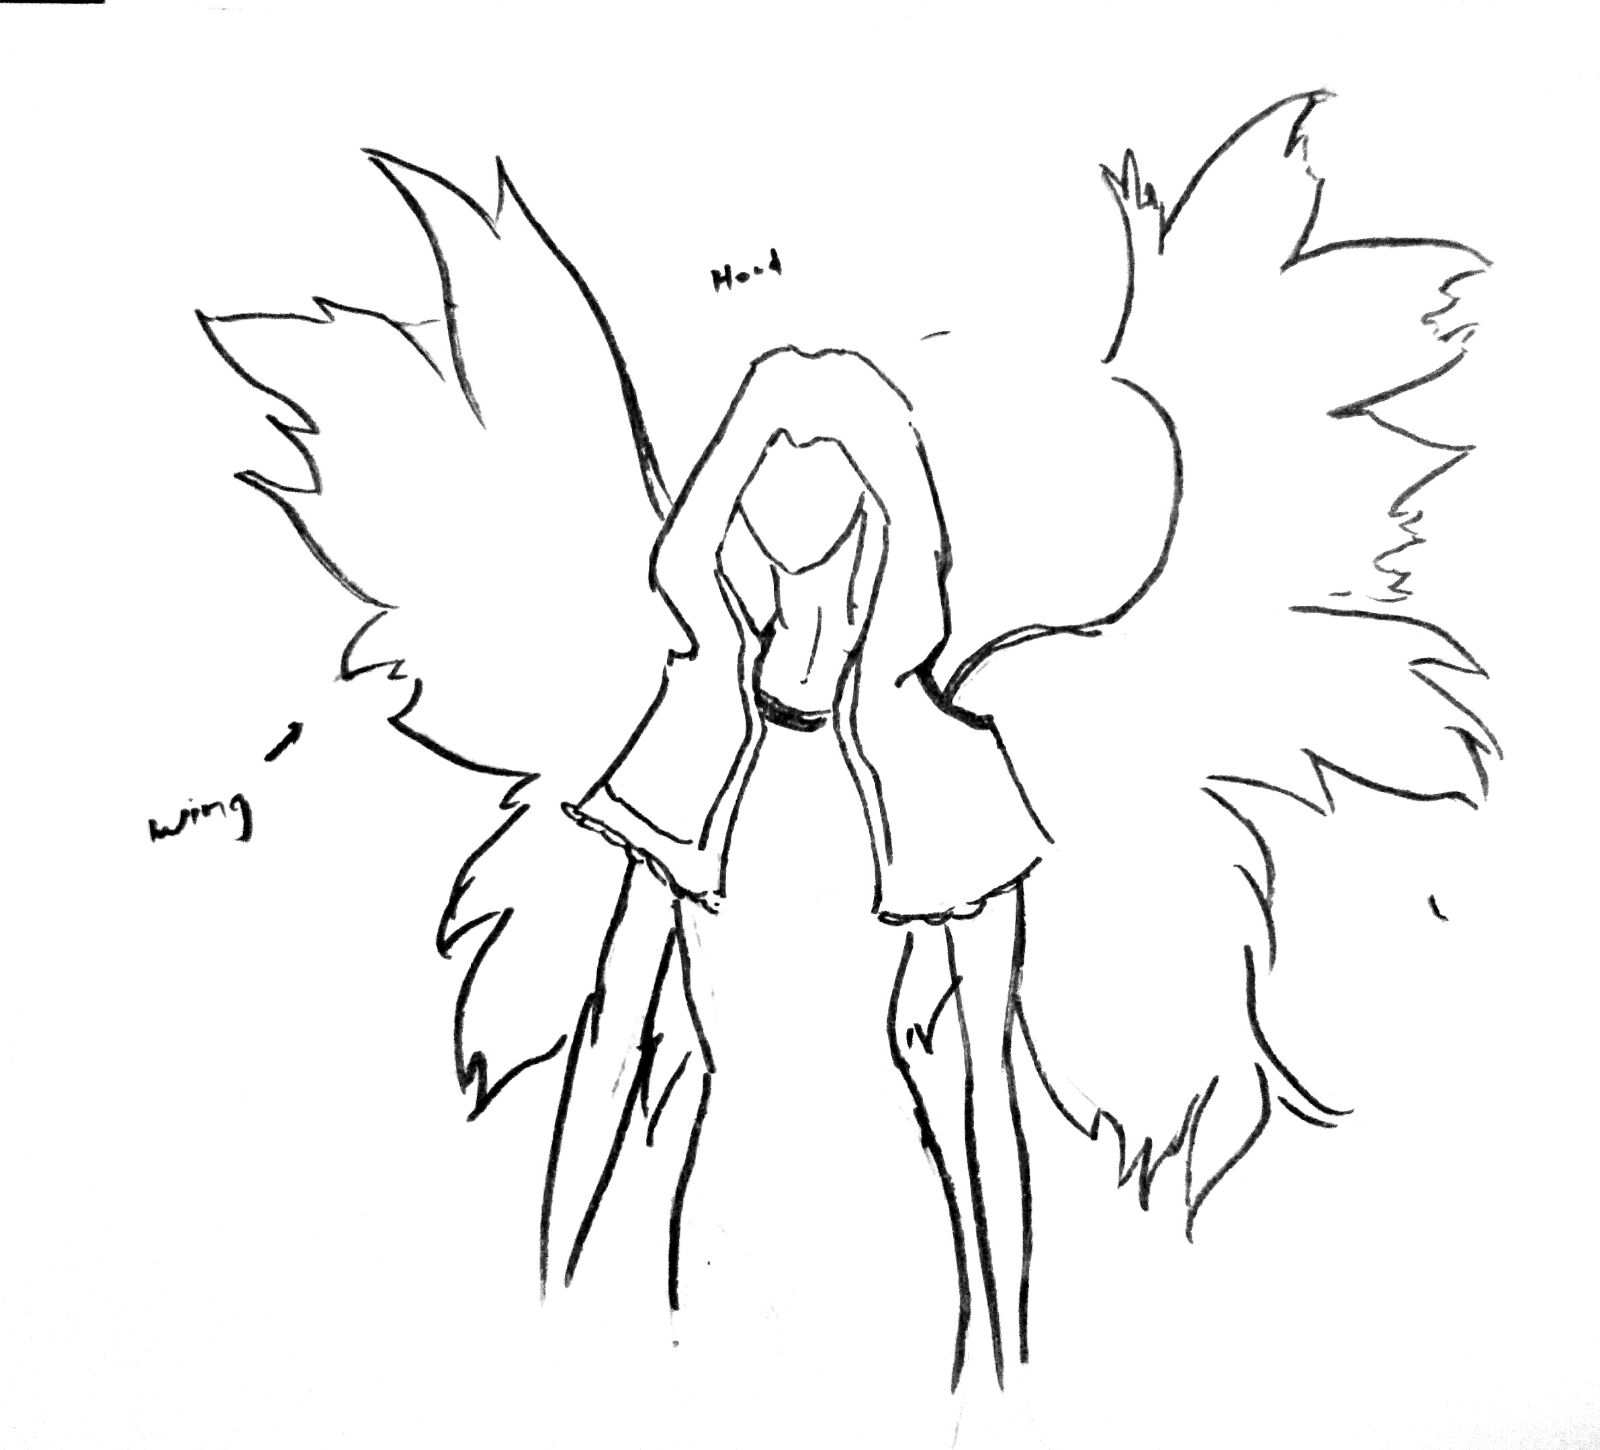

Mother earth has given us instincts to stay alive, move and think. Birds can fly, they spread their wings naturally, almost without a thought. Same with the human mind, ideas come instinctive to us as natural as flight does to those wings. I chose wings to represent the concept of idealization because more often than not, imagination takes us higher and let us soar.
Environmental sustainability requires innovation and solutions. No matter what we want to create, we need to use what the earth has. And without the earth we cannot soar towards advancement. Thus, I chose to create the wings from recyclable materials to show the importance of environmental conservation.
The hood is just for aesthetics to cover up the wires and the battery.
This is a rough sketch of the mechanism for the upwards movement. I am still deciding on the lateral movements and if I need more sophisticated systems. Currently, I have decided to work with an Arduino UNO R3 with double 9G servos. But I will perfect the design once I have perfected the movement of the wings.
Here are some references that I used to come up with the mechanisms:


And the reference for the hood:
