What is the technique?
Thermoplastic refers to the quality of a fibre whose molecular structure breaks down and becomes fluid at a certain temperature, making it possible to reshape the fabric by pleating, moulding or crushing. The fabric is ‘fixed’ on cooling and cannot be altered unless heated to a temperature greater than the one at which it was reshaped.
Vacuum Forming is a simplified version of thermoforming, whereby a sheet of plastic is heated to a forming temperature, stretched onto or into a single-surface mould, and held against the mould by applying vacuum between the mould surface and the sheet.
What are the relevant materials needed for the technique?
Thermoplastic:
- Polyester fabric
- Aluminium foil
- Rubber bands
- Moulding objects or template (e.g. marbles, laser cut shapes, yupo paper origami)
- A pot for boiling
Vacuum Forming:
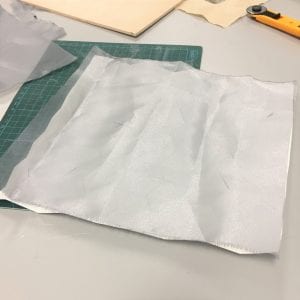
- Thermoplastic sheet (e.g. PVC)
- Scissors that cut plastic
- Objects for moulding
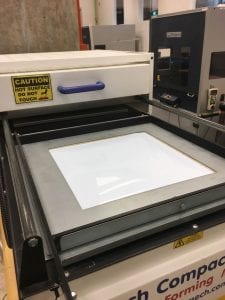
- Vacuum forming machine
How to achieve technique?
Thermoplastic:
Simply reshape the polyester fabric by all sorts of creative ways such as twisting, wrapping on marbles etc; Secure them with rubber band and wrap the parts with aluminium foil and then tie with rubber bands; Put the pieces inside the boiling water and let it heat for at least 1 hour or longer depending on the quantity and size; Take out the piece, unwrap and wait for it to cool down and dry.
Vacuum forming:
Preheat the vacuum forming machine; In the meantime, cut out PVC sheets based on the template provided; place object in the center in the machine, load it down, insert the sheet and lock it in place; heat up the sheet until it was flat after being wavy and push back the heater part; use the handle to move object up and press button at the same time; take out the finished piece and trimmed the edges.
What are the uses and applications of the technique?
Thermoplastic can be used to form all kinds of shape, either organic or uniform depending on the mould used; It can create a volumetric fabric and add texture to be part of a wide range of products such as dresses, bed sheets accessories and etc.
Vacuum forming is made with thermoplastic to create products including enclosures, packaging, helmets and baths. In terms of the small machine and material provided in school, we could use it to make packaging as well as moulds for resin casting.
Experiment
Thermoplastic:
First trial during lesson
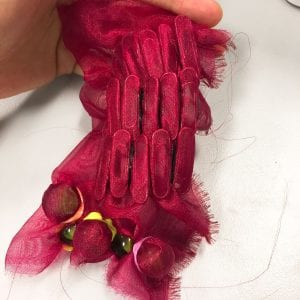
As shown in the above images, I tried different objects to reshape the polyester fabric, including marbles, key rings, bells and the other was simply by pinching the fabric up and tied it.
The metal objects rust after boiling and stained slightly on the inside of the fabric so that was something to be careful about. The patterns turned out really nice especially with the metal rings where it had stacking layers of circles. This added depth and volume to the fabric.
Second trial
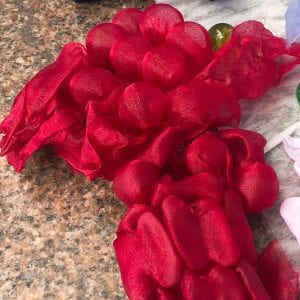
The second time, I tried to create patterns with paper clips and I did it on both the organza and a mixed fabric (probably cotton & polyester) to see what the differences were. I also put the marbles from both sides of the fabric to explore the form.
The red organza with marbles on both sides turned out quite nice and it was more 3 dimensional and bouncy. The mixed fabric surprisingly held the shapes of the objects but it was not quite able to maintain if I stretched it.
Origami Template
We also learnt that we could use a plastic sheet known as Yupo paper to fold origami and used it as the polyester template. Firstly, I drew up the pattern on my computer and used a laser cutter to produce the accurate template. This step took some trial and error time to adjust the power & speed of the cutter. And lastly I had a fold-able sheet of simple origami as shown below.
I realized that normally two pieces were used as the template when I had already set everything up. Therefore I tried my best to fit the organza onto the template bit by bit and added couples of rubber bands to secure it. The organza was cut to the size of the flatten piece of the origami. And the result was quite successful and neat.
Vacuum Forming:
Templates in two sizes
Trial and errors
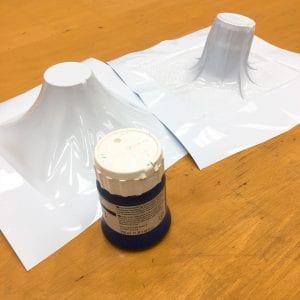
I tried vacuum forming with different objects as shown below. Some of the cylindrical objects actually formed a smooth slop around the object as I pressed pump when it was forming. Even though it didn’t fit tightly on the surface, the results were quite interesting. One of the piece broke as the air was trapped inside the small space in the center. Besides these, I also tried vacuum forming to make moulds for resin.
Personal Reflection
Boiling and reshaping polyester fabrics creates very volumetric pieces. I found it quite useful that it can be turned into both organic or organized patterns and the end result is also very stretchy and interactive. Even though it was quite time consuming and repetitive to prepare the template objects, it was a relatively simple technique to achieve nice effects.
In terms of vacuum forming, I believe it is useful to create packaging as well as resin moulds. The objects we choose for moulding should be able to withstand heat, otherwise the plastic sheet would slant sideway. We could also combine objects and create more interesting form.


