FIELD TRIP #2 Singapore Tyler Print Institute

Location: STPI

Report:

  • Historical background on STPI; Master printer and engineer Kenneth Tyler
    • STPI: From warehouse to Bespoke Institute
    • STPI as Art and Design hub through artist residency: Singapore’ Strategic Plan
  • Introduction to Aaron Curry
    • Early life and Influences, together with artwork explanation
      • Born in Texas, Austin> Chicago (BA)> Los Angeles (MA)
      • Little to no exposure to books, arts (no high culture)
      • His inspiration comes from the mundane; the everyday and his own personal experience.
      • Influences: Music (Rock, alternative), Artificial colours of spray paint (Street art), Body parts (Biomorphism)
      • His work tend to be playful as seen by his signature being placed all around the artwork.
    • Link between the artwork Centaur by Picasso and his own: The interplay between 2D and 3D
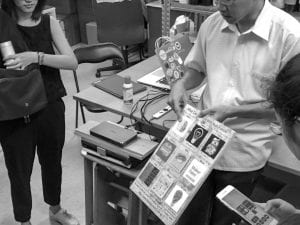
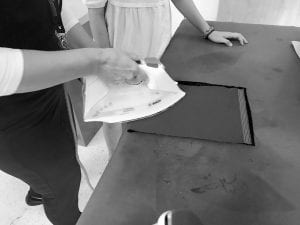
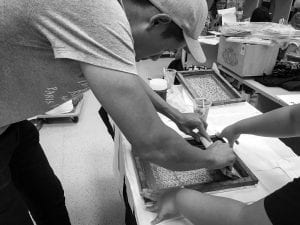
    • For the artist in residency: Aaron Curry employed 4 types of print techniques
  • Walk-through the print workshop (Camera off limit)
2D-3D scultpure by Aaron Curry
Walk-through the process of paper making

Reflection:

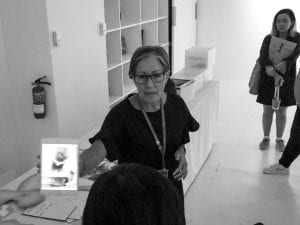
  • Host’s enthusiasm about the subject mater left a positive impression.
  • Host answered every questions and made the tour highly comprehensible through the use of relevant contemporary references that we can relate to.
  • She managed to elicit curiosity and captivate our attention by having the communication 2 ways.
  • Biggest takeaway of the tour: To take inspiration from the mundane and everyday experience: We are ever short on inspiration.


FIELD TRIP #1 TOUCH PRINT

Location: Touch Print

Report:

  • Introduction to the principles and basics of the printing process
    • RGB: Additive process, black to white
    • CMYK: Subtractive process, white to black
  • Elaboration on subject matter: How to achieve black and white on RGB and CMYK?
  • Highlighting the difference between screen print and transfer print (laser; inkjet; cutting; sublimation)

1.

2. RST paper

Demonstration #2: Clarification of doubts for transfer printing onto wooden surfaces

Reflection:

  • Host engaged us into critical thinking about the printing process.
  • Got some useful tips on how to best utilise the Magic Touch paper, which clarified doubts arose from previous experiments.
  • Showcase of samples and workshop demonstration, broadened my knowledge of material possibilities which is helpful for future considerations. (Type of transprint paper available)
  • Tutorials posted online and contact details shared by host, in case we had doubts. His thoughtfulness and consideration left a positive impression.

BLEACHING

Technique

Bleaching is a substractive technique whereby the pigments on a fabric are removed to expose the underlying base colour and create decorative patterns.

Relevant materials
– Dark colour fabric: 100% cotton, linen, rayon
– Bleach
– Elastic bands (optional)
– Rubber gloves
– Face mask
– Safety goggles
– Spray bottle

Process

Result

Reflection:

  • Unique, random motifs and pattern can be achieved from simple fabric manipulation. Every piece would be different.
  • Instant result but non reversible technique. Lots of trials and errors through experimentation are needed to achieve specific designs.
  • Realised that, the base colour of the bleached fabric can be both a plus or a limitation.

KNITTING

Technique

Knitting is a  method by which yarn or thread is used to create a cloth.

Relevant materials
– Yarn; Threads
– Knitting needles

Process

Reflection:

  • Therapeutic experience: To actually see the fabric come into shape/form is quite satisfying although the process is tedious.

RESIN/LATEX CASTING

Technique

It is the process whereby a viscous substance, of plant or synthetic origin, is cast into a negative mould and hardened over time to create the positive cast. This technique can be used to create multiple replicas of an original.

Relevant materials
– Mould
– Resin/Latex
– Coloured pigments (Optional)
– Hardener
– Container for mixing
– Weighing scale
– Small objects, for resin encapsulation

Process

Reflection:

  • The weather condition during experimentation was rather hot, therefore the latex and resin dried faster than expected. Faster drying resulted in some of cast experiments to crack.
  • From the result #1, the latex successfully took the shape of the mould  but the other end did not manage to spread evenly because it had already been solidified. Hence leaving a weird lump.
  • Even though, we followed the instructions: the casts produced from the resin were not always consistent. Some did not achieve full transparency and had a hint of yellowish tint.
  • Air bubbles were difficult to remove although the mixture was  thoroughly stirred. (enough before the resin hardens)
    • Solution: Vacuum box available in the spray paint room, could have been used to remove all the air bubbles from the resin.
    • From observation, the volume of the content reduces by 20-25% because of the extracted air)
  • Attempt to achieve layering effect with resin and paint: layers of resin should be added in increments and wait for it to start solidifying into a more viscous paste then add paint. Repeat the process until the desired effect is reached.

FIBER ETCHING (DEVORE)

Technique

Fiber etching, also known as the Devore, is a subtractive process by which plant fibers are removed using the Fiber Etch gel. The effect is most noticeable on fabric blends (combination of natural and synthetic fibers/ cellulose and non cellulose)

Relevant materials
– Fiber Etch gel
– Velvet (Silk and Viscose)
– Screen
– Squeegee
– Iron

Process

Result

Reflection:

  • The screen did not properly print onto the surface of the velvet. Possible reason: Cleaning of the screen was not thorough enough, residues from previous mixture might have been stucked into the mesh, preventing the fiber etch gel to pass through.
  • From the result: an interesting gradient can be seen: fabric to devore.
  • From above observation, new techniques can be developed.


THERMOCHROMIC PRINTING

Technique

Thermochromic printing is a technique that involves printing with temperature sensitive compounds that temporarily change colour when exposed to heat. At room temperature the ink is coloured and when exposed to heat, it turns translucent. This effect can be used to reveal underlying graphic. The compound can be mixed with other pigments to create a two-tone effect.

Relevant materials
– Thermochromic Inks
– Coloured Pigments (Optional)
– Fabric
– Screen
– Container for mixing

Process

Reflection:

  • Coloured pigment enhances the visual appearance of the pattern.
  • Cross contamination of mixture, resulted in non uniform colouration and low sensitivity to heat changes (maybe)

APPLIQUE

Technique

It is a sewing technique by which a small piece of fabric is stitched onto a larger one to create a pattern or design.

Relevant materials
– Scrap fabrics
– Threads
– Sewing Machine

Process

Arrange the different fabrics into the desired composition and secure using pins. Use the zigzag feature on the sewing machine to join the different pieces of fabric together.

Reflection:

  • The use of stretchable material for the applique was hard to manipulate when sewing, because the stretch will cause the fabric to expand or crease on one side.
  • This technique is adequate for upcycling unwanted fabric into new materials or even creating design on its own. A good example of applique pieces would be from the brand Comme des Garcons by Rei Kawakubo.

FABRIC MANIPULATION (SMOCKING)

Technique

Fabric manipulation/ smocking is an embroidery technique used to gather fabric for stretching and decorative purposes.

Relevant materials
– Fabric: Felt, polyester…
– Sewing needle
– Sewing machine
– Threads

Process

Reflection:

  • Therapeutic experience: To actually see the fabric come into shape/form is quite satisfying although the process is tedious.
  • For the type 1 smocking technique, it was difficult to keep the fold size consistent because the sewing is done on the opposite side of the fabric.
  • Additionally the fabric is harder to manipulate when the grids are smaller (based of smocking pattern) .
  • For the type 2 smocking technique, an adequate border between the sewing line and the edge should be left, so that when it is completed, the exposed edges can be tucked and hidden inside the form created (dumpling shaped).

FELTING

Technique

It is the process by which non-woven textile is produced by matting, condesing and pressing of fibres together. Felt comes in  2 types of materials: natural (wool) and synthetic (acrylic).

Relevant materials
– Natural fibers: Wool; Yarn
–  Felting needle
– Sponge

Process

  1. WET FELTING

2. NEEDLE FELTING

Result: #1 Wet felting #2 Nuno felting: Needle felting on fabric #3 Needle felting


Reflection:

  • Wet felting is hard to control, the fibers always move around.
  • Poked myself couple of times with then needle when puncturing the felt
    • Solution: Using a contraption/ another needle to hold the felt in place and puncturing it with the other hand as seen from the process image.