What is the technique?
- Dry Transfer
- Wet Transfer
- Direct Transfer Printing
- Indirect Transfer Printing
- Digital Transfer
What are the relevant materials needed for the technique?
- Paper
- Baking Paper
- Iron/Heat Press Machine
- Flat objects to create pattern (e.g. leaves, threads, feather etc.)
- Fabric or any other intended medium to be transferred onto
- Dry Transfer: Fabric Crayons
- Wet Transfer: Transprint Inks, paper, brushes
- Digital Transfer: The MagicTouch Transfer Media (TTC 3.1 for light coloured fabric, CPM 6.2 for non-fabric hard surfaces)
How to achieve technique?
Dry Transfer:
Draw pattern with fabric crayon (e.g. rubbing technique) on paper; place fabric at the bottom and then the paper with pattern facing the fabric; lastly put one piece of baking paper on top and then iron it evenly
Wet Direct Transfer:
Simply paint flat objects such as leaves with Transprint Ink, place them on the fabric with the coloured side down and then iron it.
Wet Indirect Transfer:
Paint the paper with Transprint Ink and cut to the size of the design; place fabric at the bottom and then put the flat objects to block the transferring to create the empty space in the design; place the paper with ink; lastly put one piece of baking paper on top and then iron it evenly
Digital Transfer:
Using computer software to create pattern (remember to mirror the original image for printing) and then print them onto the A4 MagicTouch medium; Turn on the heat Press Machine and wait for it to reach designated temperature; Similarly place the fabric or other material down first (for material that is not perfectly flat, we can place a piece of fabric at the bottom first to make sure a good contact of the two surfaces); lastly set the timer and start the heat press; we can remove the MagicTouch with either hot peel method or cold peel depending on the result we like
What are the uses and applications of the technique?
Transfer Printing is used to create all sorts of patterns on different kinds of medium, ranging for common merchandise such as shirts, hat, mugs, ceramic as well as wood provided the material can withstand the heat used in the process of making and the material can have good contact of the print; The end product can have very decorative flat design.
Experiment
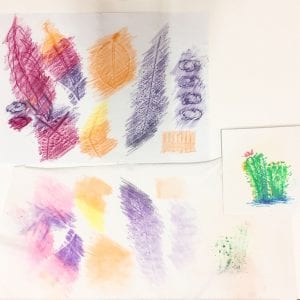
Preparation and crayon rubbing patterns on A4 paper
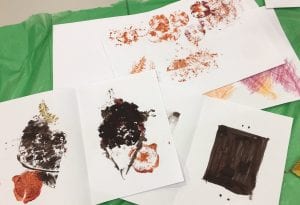
Paint directly using brushes on a mushroom
Indirect transfer patterns
I brushed the objects with different colours and folded the piece of paper to create the interesting pair of patterns. The mushroom also produced a very nice shaper with details, much like a jelly fish.
4 pieces of Transprint Ink paper
I tried to create different kind of textures and was curious to know how they would turn out.
Test prints on cotton (Using Iron)
For the Transprint ones, the colours were quite different from those on the paper and it took quite more than a minute to have the patterns transferred completely with an iron. The texture drawn as shown above didn’t show very well.
The Crayon ones were quite clear and fast with the Iron. Although I did think normal crayons work too and took quite long trying to iron the drawn pattern.
MagicTouch Prints (Using Heat Press Machine)
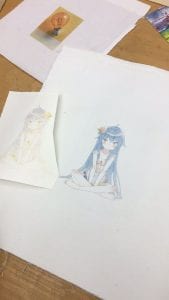
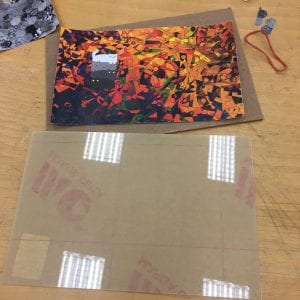
I printed 3 A4 MagicTouch TTC3.1 & 1 CPM6.2 and then cut out individual patterns. I also prepared different types of materials to be printed on, including polyester, cotton, MDF, plywood, Acrylic sheet, faux leather and aluminium sheet and etc.
Temperature: 215
Duration: 30s on cotton &Hot Peel
The first attempt seemed quite successful so I proceeded to print on a MUJI bag (made of cotton) with the same setting.
However, the image of the owl was not able to be transferred after I repeated the process twice. It was quite clear though that there was still quite a bit of ink remaining on the print.
The print on the left went well despite the colour turned greener. On the right, the blue was not as vibrant. I tried to overlay the previous bag with the green Transprint Ink piece for 35 seconds and it turned out better.
Using the same setting, I also did testing on Polyester fabric and the results were very nice. However, the white borders were also very obvious on this fabric and I think we need to trim the paper precisely to the edge if we only want the design without background. I also noted that we need to mirror the image before printing.
Temperature: 183
Duration: 1min plus on Acrylic & Hot Peel
I was curious to find out what the other side of the print be like so I tried on a sheet of clear acrylic. The acrylic sheet started soften and warped after cooling down.
Temperature: 180
Duration: 50s for plywood; 30s for faux leather
I cut out the honeycomb pattern and transferred it onto plywood and faux leather and both looked quite nice. The faux leather had a bit sunken in at the pattern but it was quite interesting.
Temperature: 180
Duration: 1min on aluminium Sheet
The design turned out very nice on the aluminium sheet as shown. I cut out small strips of patterns to test whether the colours can be overlaid.
Temperature: 180
Duration: 50s for plywood & MDF
However, the design didn’t turn out well on darker coloured material as shown. The MagicTouch Medium we used were mainly for light-colour material only. After repeating the heating process, it was still missing details and unfortunately the wood also started to warp.
After the field trip to MagicTouch Lab, I decided to try printing on white fabric again. This time, I ironed all the fabric first and adjusted the knot to max pressure for the heat transfer machine. The test print with a smaller piece went pretty well as shown above so I proceeded to print on a white shirt I brought. However, despite the exactly the same setting, the three parts turned out very differently.
Personal Reflection
I feel that this technique is very useful to create colourful decorative pattern; There will be colour difference from the original to the transferred material so maybe it is good to test out the colours before implementing onto final design; I realize that using Transprint Ink has the most vibrant colours compared to the others; Crayon has a very nice sketching doodling feel to it but the fabric crayons actually can’t create too detailed, accurate and intricate design as compared to digital print; Digital print actually depends largely on the materials used and it takes trials and errors to find out which combination(colours, types of patterns and materials) is the best. Personally I prefer the print on cotton fabric as well as leather.


