When: 9 July 2019
Members present: Vanessa
Cura
Yesterday, we re-printed our yarn feeder, main body, and needle holder. Today, we collected all of them and assembled only the yarn feeder to the main body without replacing the needle holder because it was still doing fine. Next, we continued to troubleshoot using Cura in attempt to remove sudden jerking movements during the print jobs to reduce the jamming occurrences. While troubleshooting, we modified a few settings such as further reducing the acceleration during the print job and reducing the jerk in Cura. We also tried to relocate the home position and tried to align the starting point with the centre of the plate. Unfortunately, the printer still jerked at the start of each print job and for every layer along the 2D plane.
However, we discovered something while troubleshooting that actually helped us achieve a better print job than before. By reducing the print acceleration, the yarn had more time to be in contact with the felt cloth, especially along the corners.
This helped us to achieve a more accurate print design and also reduced the impact of the jerk when printing out the outer shell. Thereby, reducing the jamming occurrences and allowed the print job to continue running for 15 minutes (longer than our previous print job – 10 minutes). However, within the infill segment, the sudden jerking movement caused the needle to be misaligned with the yarn and hence, the yarn was no longer being fed during the print. We eventually stopped the print and decided to try out a different software – Simplify 3D to solve the jerking movement problem.

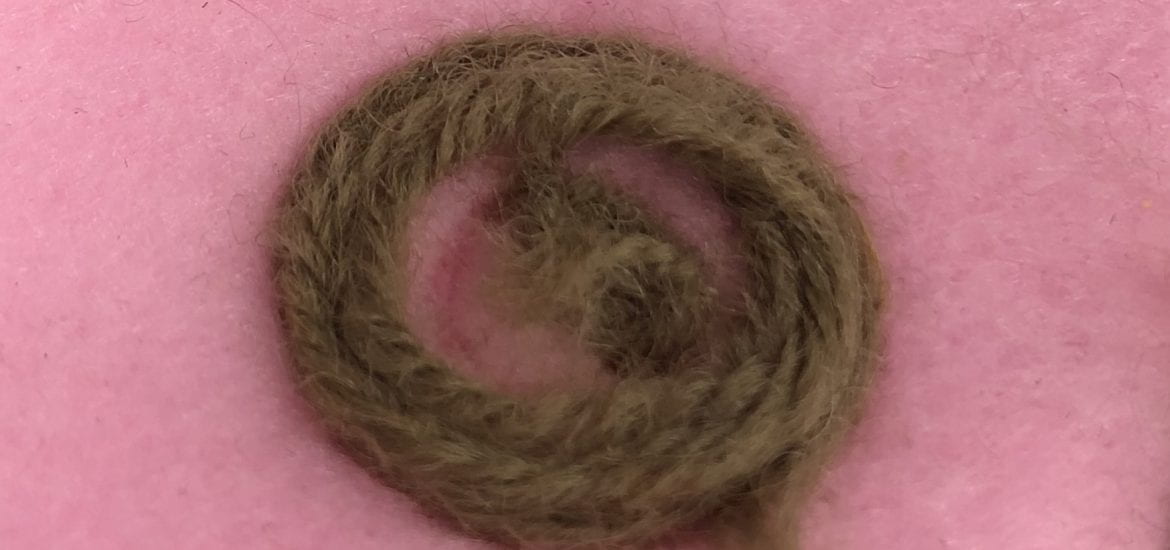
Felted half-circle (Our best print so far!!)
Simplify3D
- First, we created a new profile – feiwunuts for our Creality3D Ender Printer.
- In the Extruder settings, we changed the nozzle diameter to 2mm and the extruder multiplier from 0.09 to 1.00. A nozzle diameter of 2mm is selected as that was the size of the opening on our yarn feeder. An extruder multiplier of 1.00 was selected as it was a safe value to prevent jamming of the stepper motor. When troubleshooting, we realized that even a small value of 2.00 was sufficient to cause the stepper motor to jam.
- In the Layer settings, we optimize the start points for the fastest printing speed and changed all the first layer settings to 100%.
- In the Temperature settings, we reduced the temperature of the heated bed to 0 degrees celcius to prevent burns to our yarn.
- In the G-code settings, we activated 5D firmware (include E-dimensions), Relative Extrusion distances, Allow zeroing of distances (i.e G92 E0), Use independent extruder axes and Firmware supports “sticky” parameters. These settings were activated to enable more functions in the G-code script we have written for the initial print movement.
- In the G-code settings, we also flip the build table axis along the x-axis to align the orientation of our printer plate correctly on Simplify 3D.
- In the Scripts settings, we added in only the starting script from Cura because our goal for the day was to try solving the initial jerking movement. The starting script was directly copied and pasted as we already customized and succeeded in controlling the main body movement to prevent needle breakages.
- In the “Other” settings, we set the default printing speed to 60.0mm/min, which is the same as the one in Cura (1mm/s). The X/Y axis movement and Z-axis movement speed were set at 60.0mm/min too.
- In the “Other” settings, we also changed the filament diameter to 1.7500mm.
- Finally, we loaded a circle.stl file created from Autodesk Fusion 360 and aligned it along the axis at (0, 0, 0). Afterwards, we sliced the file using the settings on feiwunuts profile. The G.code file obtained was then ran by our 3D printer to test for sudden initial jerking movements.
Test Print Moment
When test printing, we noticed that after the 3D printer homes itself, the stepper motor will first let out a loud screeching sound. Afterwards, it will then move to its initial position before letting out another loud screech. Immediately after the second loud screech, the stepper motor started to rotate and the linear actuator moved. Thereby, allowing the needle to jab. Though there were loud screeches before the start of the print job, we realized that it did not really cause many problems as there weren’t any sudden jerking movements at all and our linear actuator was not jabbing too, which means that our needle will less likely be dragged along and broken. For now, since the loud screeches did not really cause much of a problem to us, we decided to ignore them for now.
For today, we only tested whether were there any sudden jerking movements at the start of the print job after using the customized settings on Simplify3D. Tomorrow, we will focus on actually felting the yarn onto the felt cloth with these customized settings on Simplify3D to further test and modify our settings on Simplify3D before moving on to testing our new stepper motor that just arrived today!