Progress as of 16 June, 2019.
We have ordered our drone parts and they have been shipped to and received in Singapore. Our preliminary codes for programming the stepper motor using Arduino are currently being made by Cong Sheng and Jianjun. More designs of the camera mount/ gimbal are also being prepared using TinkerCAD and Fusion360.
Our next steps would be to construct and assemble the drone while 3D printing some of the camera mount designs.
Progress as of 1 July, 2019.
We have assembled our drone, the A250 racing drone from HobbyKing (with a makeshift landing gear using foam), and sent it for a test flight (which unfortunately, failed) due to inaccurate calibration. However, after factoring in the battery power, the weight of the drone and gimbals with regards to the amount of thrust achieved, we may need to rebuild a bigger drone with a higher battery voltage in order for it to fly a greater distance and height.

After consultation with Kanesh (MAE) and Tony (MnT), Jianjun and Cong Sheng have started calculating the suitable thrust to weight ratio, flight time and suitable throttle percentage.
Mistakes were made…
At this time, our drone can fly for only 5.4 minutes… and here is why.
First, let’s understand the specifications of our current set-up.
Battery: 1300mah (major mistake!)
Motors: EMAX RSII 2306 2400kv Motor (another mistake!)
Propellers: Diameter 5, Pitch 3.2
To estimate the flight time in hours, the battery rating is divided by the total current drawn by each components. The flight time can then be converted to mins. Tony has also kindly suggested the use of the website https://www.ecalc.ch/xcoptercalc.php which can help us calculate the various specifications such as flight time, weight-to-thrust ratio, etc with the input of the exact components or similar ones.
Progress as of 16 July 2019
To extend the flight duration, we have replaced the 1300mah Li-Po batteries with 2700mah Li-Po battery instead. As a result, we could increase the flight duration to about 8-10 minutes (under estimate) as tested.
After testing the flight of the drone after minor adjustments, the drone was deemed as stable for its built. After all, the drone is inherently designed for racing and not for stable flight. Even if we are able to spend a lot of time and effort in tuning for perfect PID values, the flight would still not be as stable as other drones which are designed for stable flights. Below is a video of the test flight for the drone.
To ensure stable footage for the various applications such as mapping and construction inspection, we have therefore decided on getting a more suitable drone for our project, namely the F450 frame which is, not too big for indoor flying, yet still has the stability for aerial photography and videography.
The main issue with the new drone is the pixhawk, which is a different flight controller from the one we have been using. We are currently learning to calibrate the pixhawk as the assembly of the drone has been quickly done especially since it is not our first drone.
Progress as of 19 July 2019
The 450mm drone was assembled namely by Cong Sheng and Jianjun, with the gimbal design and assembly by Amanda. This drone came in a kit, which we have purchased from Aliexpress.

Set-up of the new drone are as such.
Battery: 2700mah
Motors: EMAX RSII 2306 2400kv Motor (mistake!)
Propellers: Diameter 10, Pitch 4.5
Below is a video of our test flight (which failed):
Progress as of 28 July 2019
We have changed the motors to the Emax 2212 980KV Brushless Motor (due to our other motors being spoilt or being incompatible with our drone’s frame). Our finalised drone’s frame (as seen below) is the RipaFire F450 4-Axis Flame Airframe and it is controlled by PixHawk. The power distribution board (PDB) is from Mateksys. Our drone is fitted with a 2700 mAh 3 cell LiPo battery. Our drone’s ESC is the XILO 40A which runs on the BLHeli_S Firmware. Our propeller for the F450 is the 1045 propeller (which means it has a 10″ diameter and a pitch angle of 4.5″).

Top view of our F450 drone, together with the joystick and the Turningy Evolution Controller.

Close up shot of our F450 drone. The design of the top camera and gimbal can be seen in the picture.

Shot of our F450 drone and our old A250 racing drone with top camera and gimbals visible.
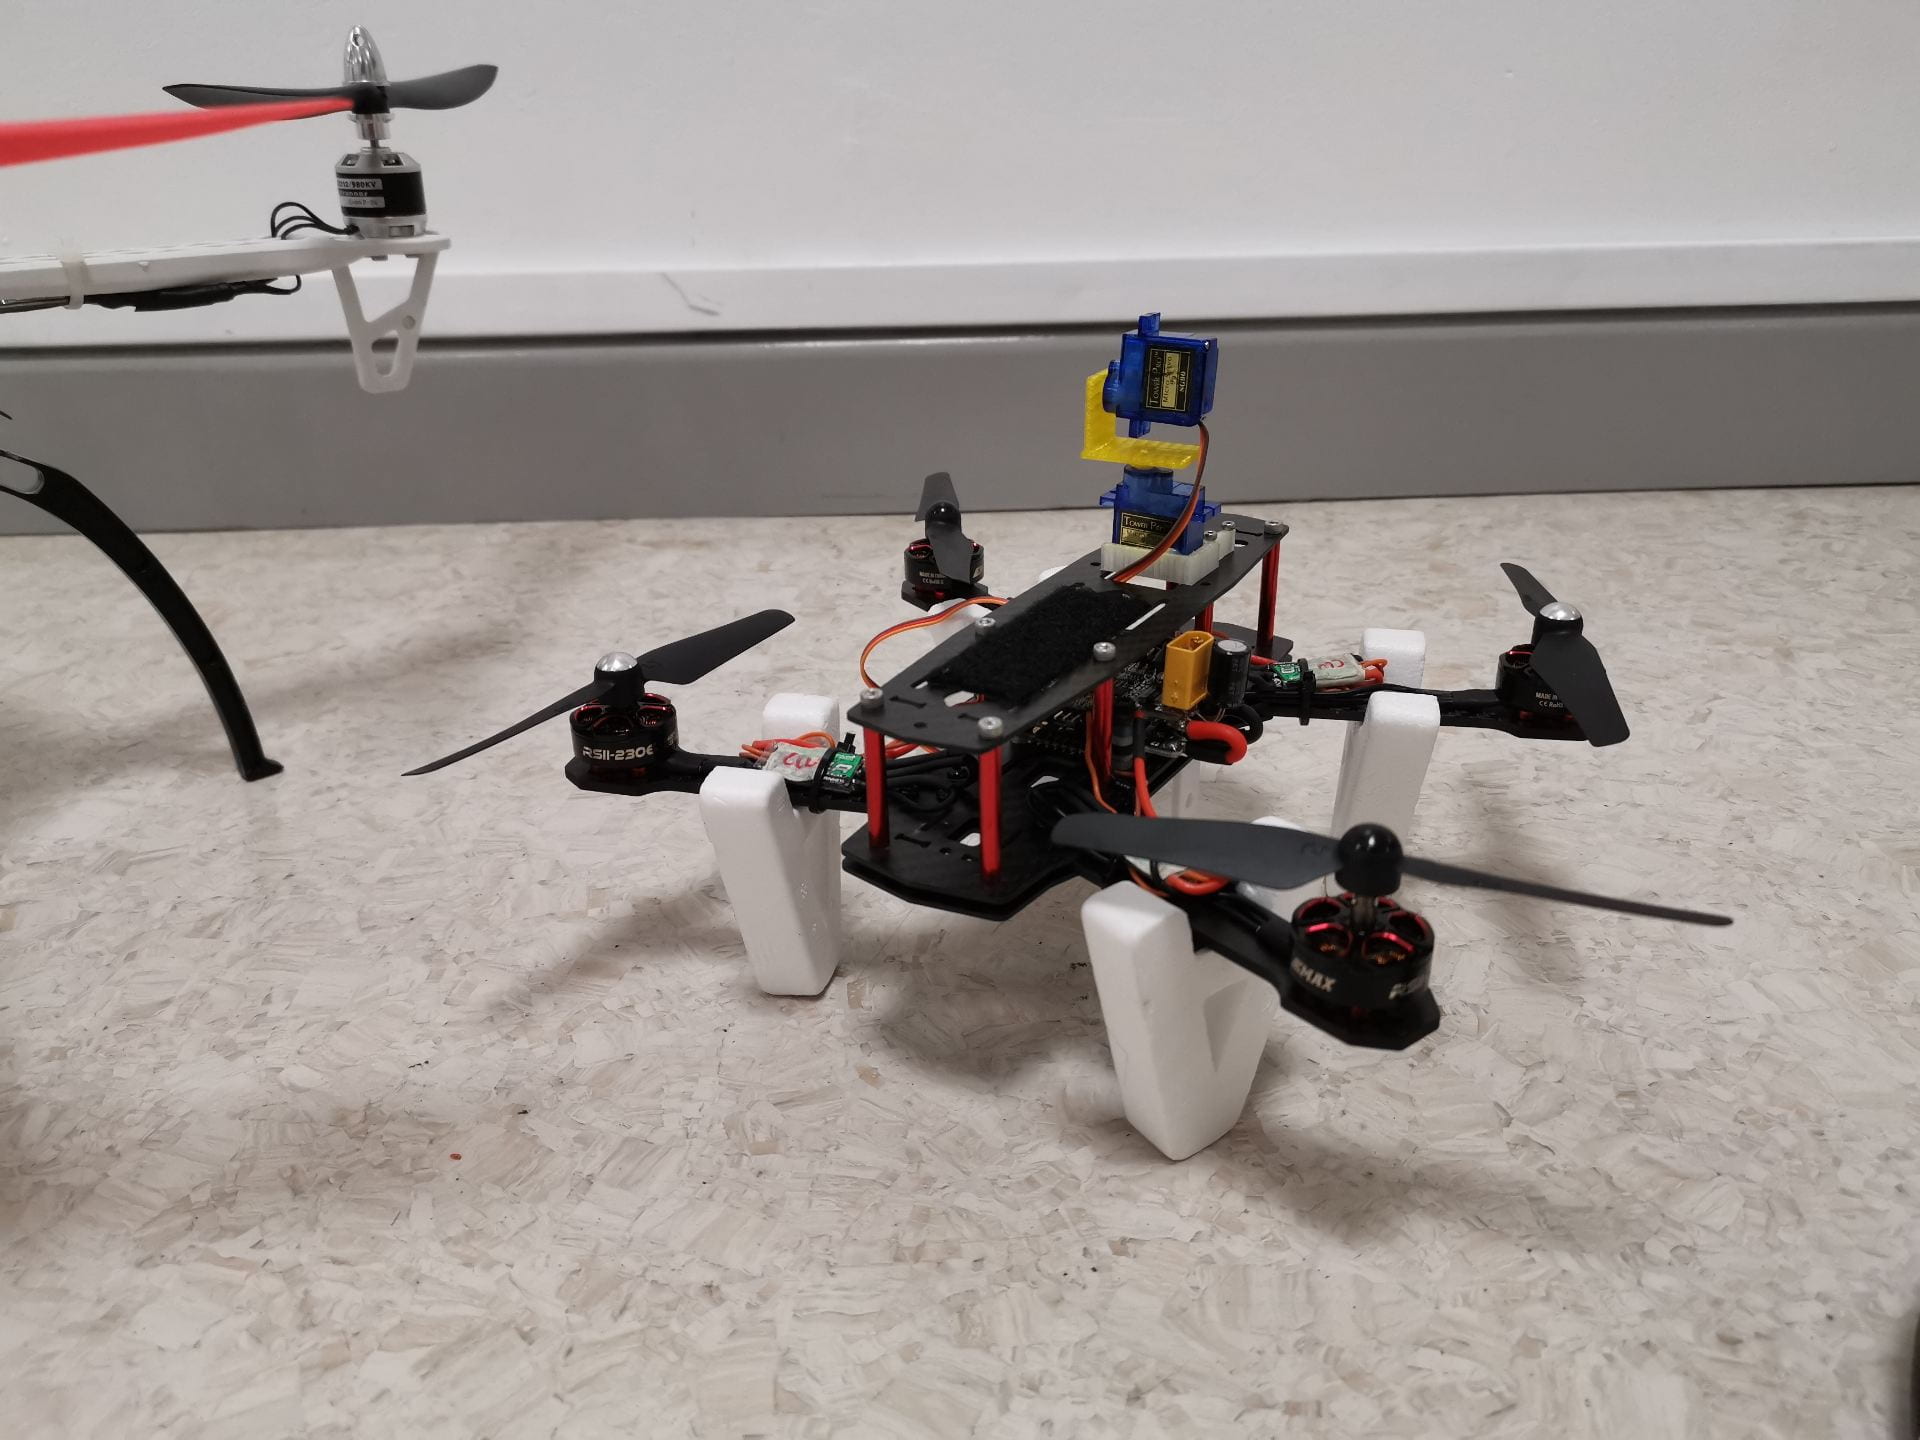
Close up shot of our old A250 racing drone with top camera and gimbal.