[wpspoiler name=”LOGIN AND ACCESS THE ADMIN PANEL/DASHBOARD” ]
- Add “wp-admin” at the end of the blog url in your web browser. For example: https://blogs.ntu.edu.sg/sbsteaching/wp-admin
- Login using your NTU username and password.
- Upon successful login, you will be routed to the admin panel or dashboard of your blog site.
[/wpspoiler] [wpspoiler name=”CREATING A TEXT POST” ]
- Go to Posts > Add New. Enter a title of the post.
- Enter your post content using the post editor. There are two modes of editing: Visual and Text. Choose the mode by clicking on the appropriate tab. Visual mode gives you a What-You-See-Is-What-You-Get (WYSIWYG) editor. Click the secondrow icon
 in the row to get a second row of controls. The Text mode allows you to enter HTML along with your post text. Please note that typing or copying HTML codes with visual mode will reformats your html code.
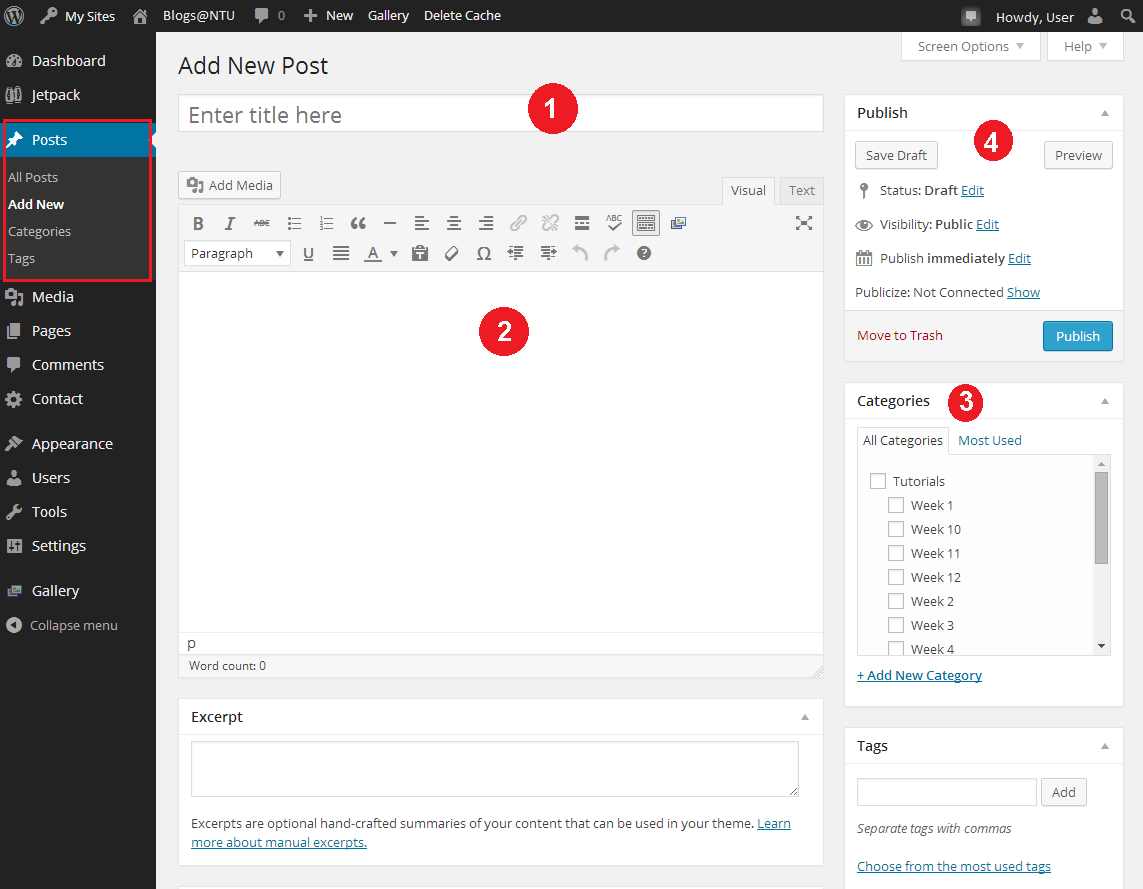
- To add media into your post
Click icon above the post editor to insert media files. You can select existing images and files (e.g. PDF) already uploaded to the Media Library, or upload new media to insert to your page or post.
 - To embed media to your post
You can also embed media from many popular websites including Twitter, YouTube, Flickr, and others by pasting the media URL on its own line into the content of your post. To learn more about embeds, please visit http://goo.gl/VfZnu - To insert a hyperlink into your post
Select the text you want to be hyperlink. Click the link button . Paste the desired URL into the link field.

- Set category(s) to your post. Categorize your posting.
- Publish your post. You can set the terms of publishing your post in the Publish box. For Status, Visibility, and Publish (immediately), click on the Edit link to reveal more options. Publish (immediately) allows you to set a future or past date and time, so you can schedule a post to be published in the future or backdate a post.
- Preview your page to see how it really looks like.
- In the post editor, click on Add Media button located just below the title field.
- Once you click on the Add Media button, a popup will appear. Click on the Create Gallery link on the left column.
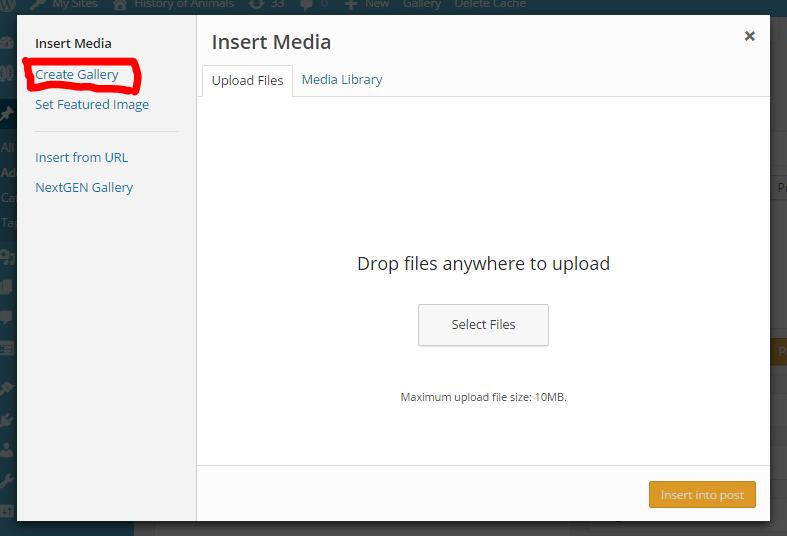
- You may use existing images from the Media Library or upload your images by dragging it to the available space. You can upload multiple images at once.
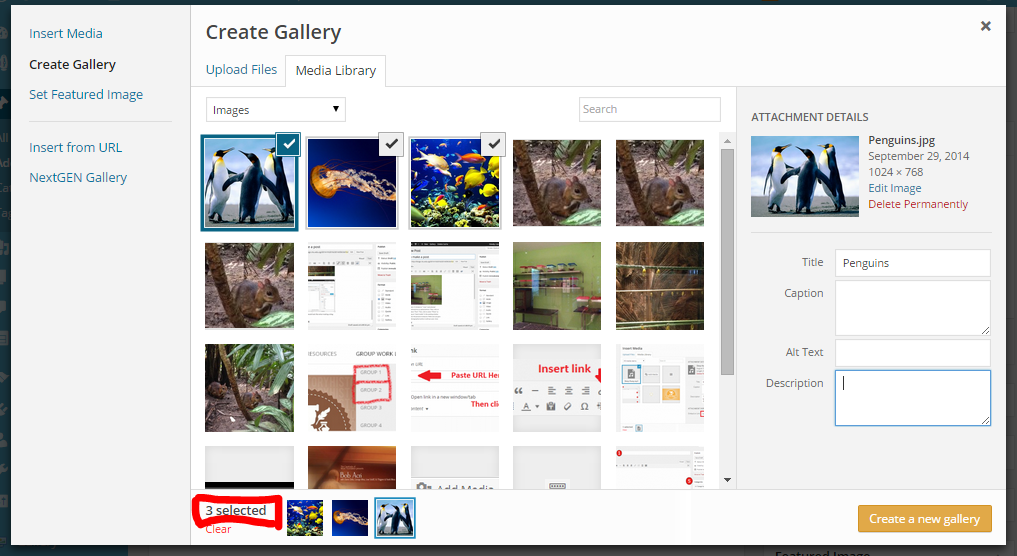
- Once finished, you will be able to add caption, alternate text and description.
- You will be able to choose which are the images that you want to include in your gallery. Your current image selection will be reflected on the bottom part of the popup. To de-select the image, simply click on the “tick” icon of the image.
- After you finished selecting, click Create a new gallery.
- Now, choose your desired gallery type and appropriate settings
- Click Insert Gallery.

- The images will line up in the post or appear as a blank box. You can only preview them but clicking Preview.
[/wpspoiler] [wpspoiler name=”CREATE AN IMAGE GALLERY OR SLIDESHOW” ]
[/wpspoiler]
Sample Titled Mosaic Gallery

Sea

Mussels

Sunset

Lights

Snow
You must be logged in to post a comment.